

Dry Age Beef at Home
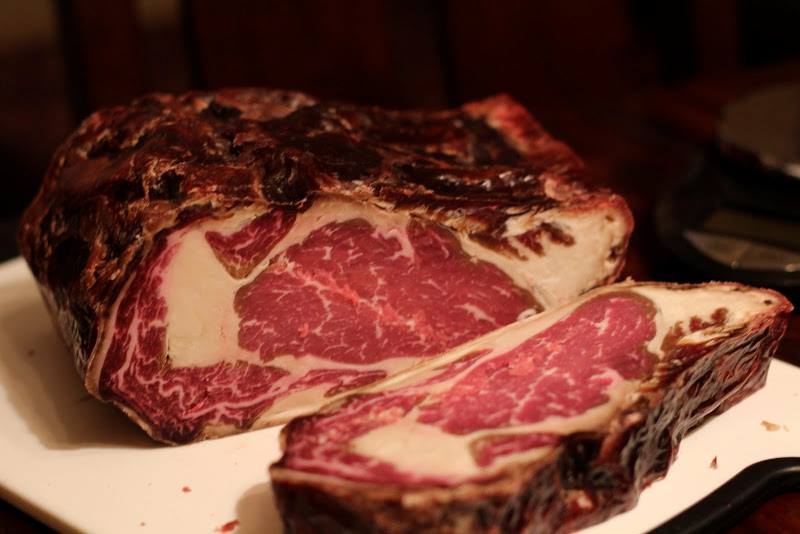
You’ve come pretty close to heaven on earth if you’ve ever eaten a 4 to 6 weeks dry-aged thick prime steak (and reverse seared).
There is a good chance that the steak you purchase from your nearby grocery store is wet-aged steak. Wet-aging is a pretty new technique contrast to dry-aging, which is centuries old, invented near 1950s.
Most Americans prefer dry-aged beef over wet-aged steaks, which use the same method of vacuum sealing the steaks as done to prevent freezer burns to the meat. The basic phenomenon is that without the presence of oxygen, wet-aging does not undergo the chemical changes that occur in dry-aged steak. Therefore, wet-aged steaks are more bright in color and have a more “bloody” taste whereas, the dry-aged steaks have a more dull complexion and are more rich in flavors.
Wet-aging is preferred by most of the grocery stores since it is very cheap and requires far less time and effort than dry-aging. Thus, a wet-aged steak is easier and cheaper to find.
MISCONCEPTIONS ABOUT DRY AGING
There are many misconceptions involved when it comes to dry-aging your meat at home.
One of the most popular misconception is the use of cheesecloth or paper towel in your fridge to dry-age the steaks for six to seven days. This does dehydrates the beef (enriching it with flavor) but it is important to note that it does not properly age the meat. It is very important to note that a steak needs to be dry-aged for at least two weeks for it to properly tenderize and needs to be aged for three weeks if you want enriched flavors and enzymes to do all their magic. This enzyme magic will definitely not happen in one week even keeping the meat in fridge lined with cheese cloth or paper towel.
In short, dry-aging is a mix of patience, dedicated equipment, time and prime cuts of meat.
WHAT YOU NEED TO DRY-AGE BEEF
A top notch cut is a prime requirement if you want to dry-age your beef at home. It is important to note that dry-aging is done on the complete roast before it is cut into steaks. It is highly preferred to buy a cut that has a thick layer of fat on its outer layer. This will make sure that you will only lose fat when you cut the outer layer at the end of aging process.
The following equipment is required:
- Dedicated Refrigerator
- Small fan
- Tray (to catch any drippings)
- Wire mesh cooling rack
Important Note: Dry-aging needs a dedicated refrigerator and do not place your beef with other foods to prevent it from picking up flavors from those foods.
HOW TO DRY-AGE BEEF AT HOME
- First you need to setup a small fan inside your fridge to maintain a good airflow. Then you need to put the cooling rack on top of the tray, to make sure that your meat is exposed to air from all sides and the tray will collect any drippings.
- Put the meat on top of the wire rack and slide it in the refrigerator. Depending on the level of taste and tenderness, you could wait anywhere from four weeks to eight weeks. Where it is fine to check your meat sometimes, do keep in mind that every time you open your fridge you would throw off moisture levels and introduce some unwanted flavors/odors from outside. Therefore, it is highly recommended not to check you meat more than once if you are dry aging your beef for four weeks.
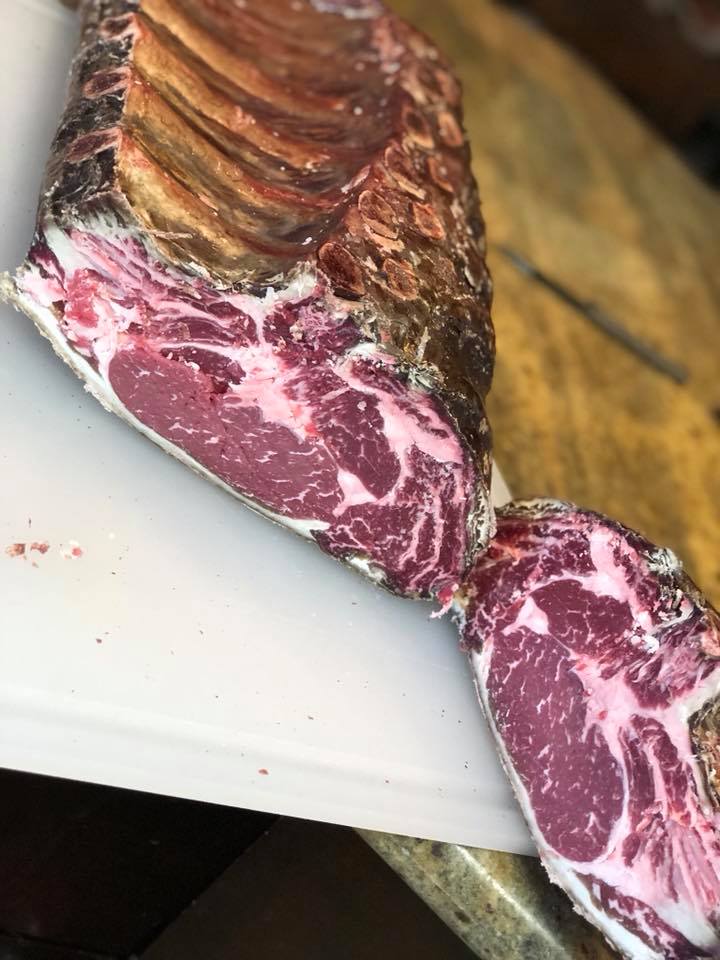
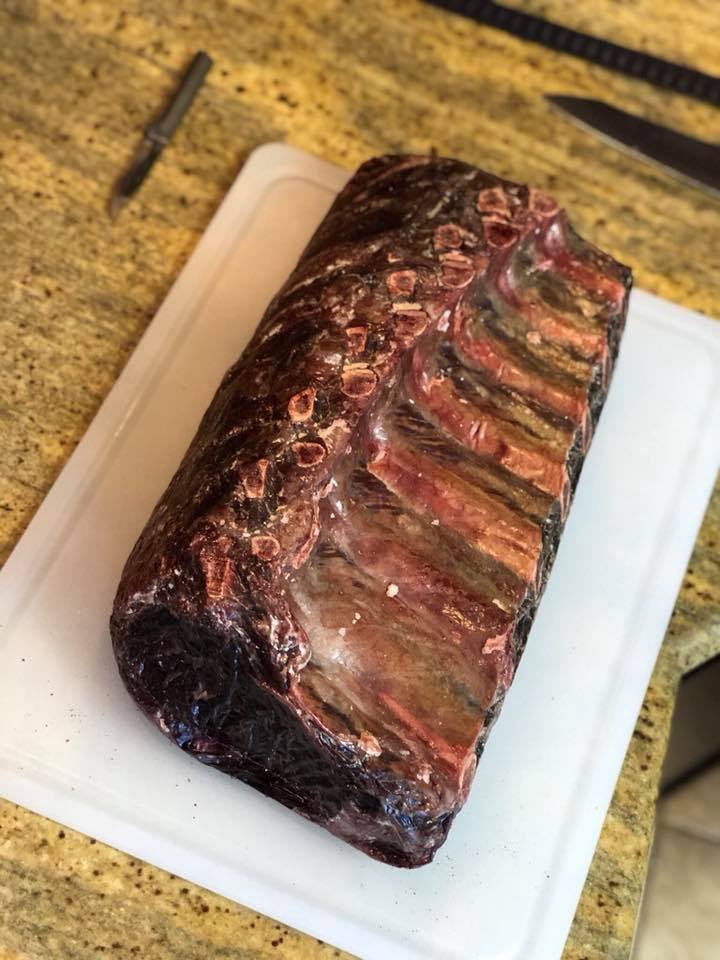
- After you have aged your cut for your preferred length of time, you can remove it from the refrigerator and cut any purple/brown mold that has developed on the exterior, as well as the fat. Finally, you can now cut your roast into individual steaks with a recommended thickness between 1 to 3 inches.
Remember: Since the refrigerators at home are not meant only for dry-aging meats, the control over humidity, airflow and temperature is very limited and therefore, dry-aging at home is generally not very comparable to professional dry-aged steaks. That generally would conclude that it would be very difficult to replicate the signature taste of famous professionally dry-aged meats.